
Connecting to EPSILON/PSI with SSH Secure File Transfer

Installing SSH Secure Shell Client
- Click on the link below to download the installer file for SSH Secure Shell from the FSU User Services website. You can save the file to your desktop.
http://www.bio.fsu.edu/complabs/files/SSHSecureShellClient-3.2.9.exe
Note: You must be on a FSU IP to download this file. - Double click on the file to start the installation. Follow the onscreen instructions and click Finish when done.
- To open SSH Secure File Transfer Client, click on Start -> Network -> Secure File Transfer Client. (If you installed SSH Client yourself, you will find it under Start -> Programs -> SSH Secure Shell -> Secure File Transfer Client.)
-
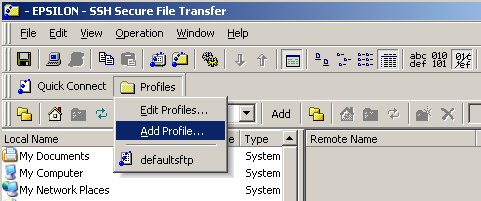
Click on the Profiles
button, and then on Add Profile. Type any name for the
profile you are setting up. e.g. if you are setting up a profile to
connect to bio.fsu.edu, you may call it EPSILON.
-
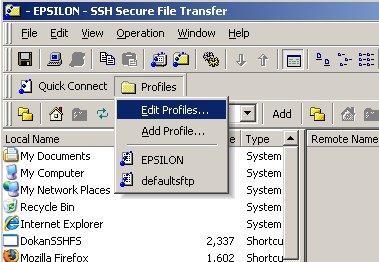
Click on the Profiles
button again, and then on Edit Profiles. Select the
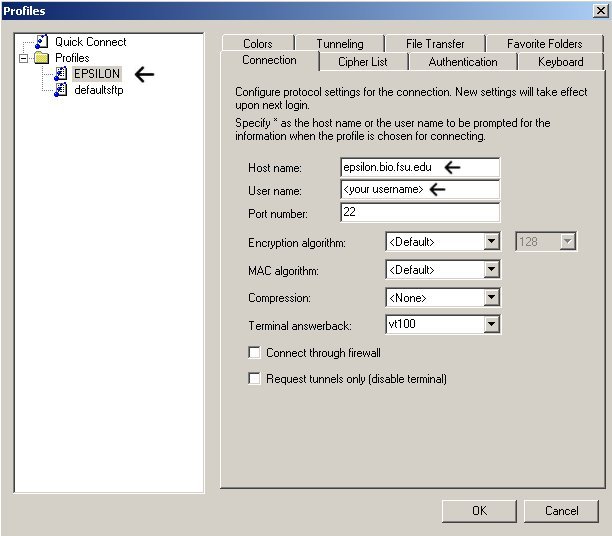
profile name that you entered in step 2, go to the Connection
tab and only fill in the Host name: and the User
name:. Do not change any other fields. Click on OK
after you are done. You will need to repeat steps 2 and 3 every time
you set up a new profile.
- When you want to connect to the profile that you've set up, click on the Profiles button, then click on the name of the profile you want to connect to.
- When you connect to a profile for the first time, a "Host Identification" box will pop up, which will ask you if you want to save the public key, Click on OK to save the key to a local database.
- When the password box pops up, enter your password and you are connected.